Monday, March 3, 2014

rolled buttermilk scones: a tuesdays with dorie post


such a dark and dreary day.  cold and icy and snowy.  who isn't over this winter thing yet?  this weeks tuesdays with dorie baking challenge was buttermilk scones.  they were the perfect treat to pair with a steaming hot cup of tea on such a cold and damp day.

scones recipes call for cold butter to be cut into the dry ingredients.  this recipe was no exception.  to get the job done, i used my vintage piano wire dough cutter.

the recipe instructs you to cut the butter into the dry mix until it resembles coarse meal.  i left some small lumps of butter because that will add to the flaky texture i prefer in a scone or biscuit.


after the butter is cut in, buttermilk is added and the dough is kneaded about a dozen times.  in my opinion, the kneading is not necessary.  mix it up and pat it out.  game over.  the recipe gave us two options;  classic wedges or filled, rolled up and sliced.  since i have made more wedge shaped scones than i could ever count, i opted to make the rolled scones.  the dough was patted out into a 12" x 4" rectangle that was about a half inch thick.  first, a brush of melted butter, then a sprinkle of sugar before topping the dough with some candied lemon peel and candied citron that were left over from holiday baking.

there wasn't much to work with as far as rolling up the dough.  i didn't get much of a spiral and they looked more like a donut with a clump of dried fruit in the middle.  with a final brush of melted butter and sprinkle of sanding sugar over the top of each spiral, they were ready to be baked.

 a close up view of the spiral.

my work table.  i love being able to work with dough on the tabletop.  it is next to a large window and i get lots of natural light on my workspace.  the bench knife is one of my favorite tools.   it is one of those tools that once you have one, you cannot go without it.  first i used it to cut the butter up into little cubes.  then i used it to slice the spirals.  finally, a quick scrape across the tabletop removed all of the dough and flour.

the rolls took several minutes longer than the 10-12 minutes that the recipe called for.  in my oven, it was more like 15-16 minutes.

a quick and easy treat to make, scones are always a favorite of mine.  however, i was not impressed with this recipe.  it was not buttery enough for me-the recipe could have used a couple more tablespoons of cold butter cut into the dough.  it also could have used a little more buttermilk-i only used the amount called for since i had no experience with the recipe, i did not want to add too much.  then, there was the kneading which was totally unnecessary.  next time, i will stick to my own recipe but i may try the spiral slices again.

to see the recipe, visit this site.  but as a cookbook author, i ask that you consider buying the book, baking with julia.  it is a wonderful book to add to your cookbook collection!  to see what the other tuesdays with dorie bakers came up with, visit the website.

Saturday, March 1, 2014

cherry frangipan coffee cake

cakes are wonderful.  so many flavors to try.  almost as many shapes to bake them in.  honestly, there is something really special about a tube pan.  whether it is baked in the standard angel food pan or a fancy bundt pan, does not matter, either type will work and all of them add a little extra magic to the cake.

bundts and tubes make great cakes for parties, picnics and potlucks.  they generally do not need much frosting and slice well.  for me, the cakes are the perfect gift to take out to the garden to thank my fellow garden volunteers for helping tend to the beds.  they are also a great choice to take to the class each week to share with the interns since slices can be nibbled without the need for a plate or fork.   the biggest challenge i face is choosing a flavor each week, sometimes twice in a week.  

this week, i chose to pair almond paste and tart cherries.  my favorite coffee cake recipe is so versatile that adding almond paste is a great way to make the same cake seem different.  this cake recipe uses the same base recipe as the cranberry-orange coffee cake i posted several weeks ago.  almond paste is easy to find, it is sold in the baking section of the supermarket, usually near the pie and pastry fillings.  the little cans have 8 ounces of almond paste in them and while it seems like a small amount, a little goes a long way in terms of flavor.  

when i open a can, i always cut it into four equal pieces and since i generally use just two ounces at a time for a coffee cake, i wrap each piece and store them in a container in the freezer.  then when i need some, i simply pull it from the freezer, cut it into cubes and let it thaw out and soften before adding to the batter.  to use in the recipe, i generally replace about 1/4-1/3 of the butter with almond paste.

another thing i love about tubes and bundts, you can hide a filling in them without having to worry about the cake collapsing from the weight!  for this recipe, i used some really well drained tart red cherries.

ssshhh...the filling is a secret!

and if the cake wasn't already enough, i went and added crumb topping.  actually, it could be that the cake was the vehicle for the crumb topping, just sayin...i love crumb topping!

beautifully baked-nothing else needed

however, i just couldn't help myself.  it seemed like such a waste to pour the cherry juice down the drain.  quickly, i stirred the cherry juice into some powdered sugar.

pink glaze for the top of the cake, add enough juice to make a slightly thin glaze that drips slowly from the spoon rather than running off quickly-a thicker glaze will stay on the cake better than a runny one.

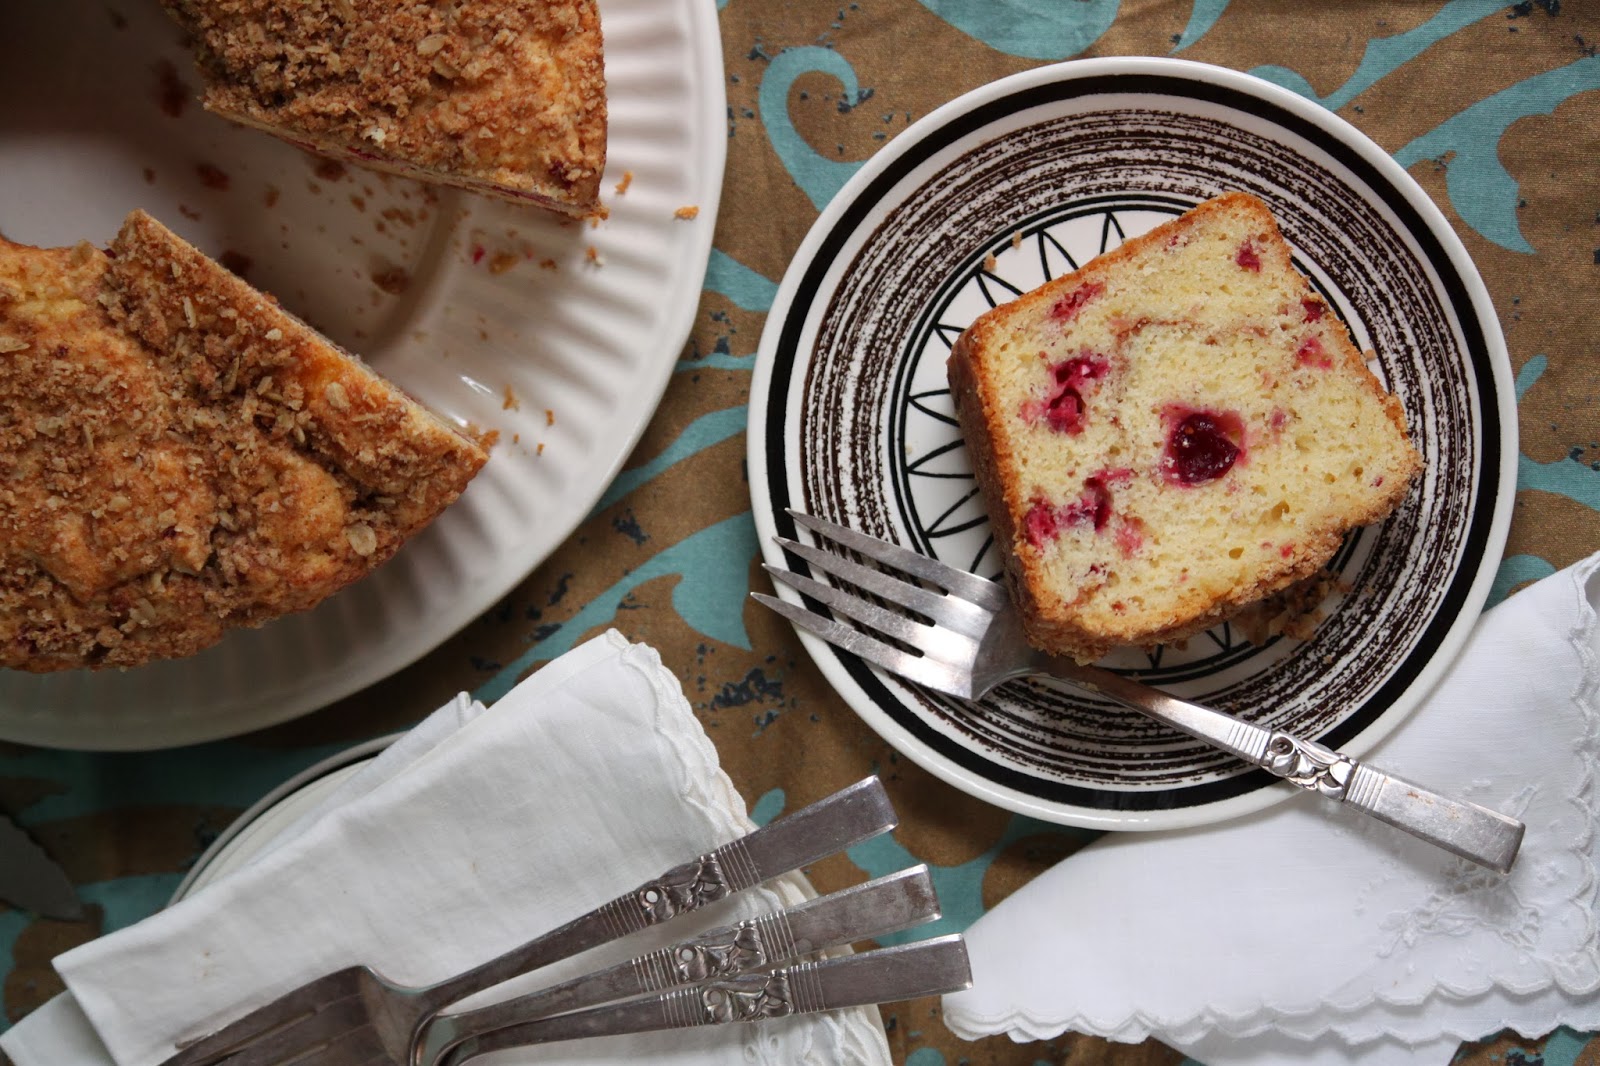
now that's a coffee cake!  careful little drizzles prevented it from getting soggy and saturated with glaze.

cherry-frangipan coffee cake
1 (10") tube or bundt cake
serves about 16

crumb topping
1/2 cup unbleached all purpose flour
1/2 cup rolled oats
1/3 cup dark brown sugar
1/2 teaspoon ground cinnamon
1/8 teaspoon baking soda


4 tablespoons unsalted butter, cold and cut into small cubes

cake
4 ounces unsalted butter, softened
2 ounces almond paste
2 cups granulated sugar
1/2 teaspoon salt
3 eggs
3 cups all purpose flour
1 tablespoon baking powder
3/4 cup buttermilk
1 (14.5 oz) can tart red cherries, drained well, juice reserved
1 cup powdered sugar

to make the crumb topping, place the flour, oats, brown sugar, cinnamon and baking soda into the bowl of a food processor.  pulse a few times to combine.  sprinkle the butter cubes over the top of the mixture and pulse to cut it together.  continue to process the mixture until it begins to clump.  dump the mixture out of the bowl and set it aside.

preheat the oven to 350.  grease and flour the tube pan and set it aside.  to make the batter, place the butter, almond paste, sugar, and salt into the processor bowl and process until smooth.  with the motor running, add the eggs, one at a time and process until mixed.  scrape the bowl and pulse a few times to be sure it is combined.  dump the batter into a large mixing bowl; the rest of the recipe is combined by hand with a rubber spatula or a large wooden spoon.

place the flour and baking powder into a sifter or a mesh strainer and sift it over the batter.  fold the mixture a few times, sprinkle the buttermilk over the batter and fold it together.  carefully place half of the batter into the prepared pan and spread it out so there are not huge gaps and vacant areas-it does not need to be perfectly level.  arrange the drained cherries over the batter in the pan and top them with the remaining batter.  sprinkle the crumb topping evenly over the cake and bake until a pick inserted comes out clean, about 1 hour.  cool the cake in the pan for 20 minutes and then remove it from the pan and allow it to cool completely on a rack.

to make the glaze, sift the powdered sugar into a bowl.  while stirring, add enough of the reserved cherry juice to make a slightly thin glaze that pours off a spoon slowly.  drizzle small amounts of the glaze over the cake on the rack-how much you use is up to you, i used the entire amount for this cake.

the cake is best cut when completely cool.  to store, keep it covered in a cake container at room temperature up to 2 days.  to store in the freezer for up to a month, cut and wrap slices well in plastic and place them in a plastic container or bag before freezing.  thaw the slices, still wrapped in plastic, at room temperature.


Thursday, February 27, 2014

bulgur wheat bread

let me start out by saying that bulgur is not cracked wheat.  same grain but two completely different products.  bulgur is a partially cooked whole grain wheat that is cut to various sizes while cracked wheat is simply that, uncooked, whole wheat grains that are cracked into pieces.  they are also not necessarily interchangeable in recipes.  something i learned the hard way recently!

every now and then, i get a wild hair and try to make something with a recipe i found on pinterest.  yes, a crap shoot has better odds but sometimes, you just gotta live life on the edge and this is about as risky as i like it.  a recipe for cracked wheat bread popped up in my feed and i thought, well why not try it out?  no cracked wheat in the pantry but there is plenty of bulgur, what is the worst thing that could happen???

for starters, the bulgur soaked up the water like a sponge!  if i were to ever make this again, i would definitely add at least an extra half cup of water to the dough along with the cooked bulgur.  because i did not do that, i used only half of the flour that the recipe called for and the resulting loaf was a little smaller and a little denser than it should have been.

the dough rose quickly.

it was easy to work with-it shaped nicely.

ready to rise.  before baking, i gave it a coat of egg white wash and a generous sprinkle of sesame seeds.  a nice deep slash to the center was the final touch before baking.
  
out of the oven and ready for a close up view

the bread was a little denser due to the reduced amount of moisture but that did not matter much.  it made lovely toast and really tasty grilled cheese sandwiches!

nothing quite like a slice of fresh baked bread with a slathering of butter and a sprinkle of salt.

to see the recipe, head over to the blog, girl versus dough and bake up a loaf.  remember, if you do not have cracked wheat, you can use bulgur but you will need only half of the flour called for in the recipe or you can add additional water, about 1/2 a cup to the dough and add flour as needed.

Tuesday, February 18, 2014

chocolate-mascarpone cheesecake; a tuesdays with dorie post

nothing says valentine's day more than chocolate so the timing perfect was perfect for the tuesdays with dorie bakers to mix up a chocolate-mascarpone cheesecake.  my only wish was that i would actually enjoy it.  sadly, i am one of those people that just does not like the combination of chocolate and cream cheese and this cheesecake did little for me.  to compound matters, my husband has to limit his intake of dairy products because despite how much he loves them, they do not like him much at all!  the good news, we were attending a white elephant/pot luck lunch and this was the perfect treat to bring along to share.

to make the cakes so that serving them at a potluck would be easy, i filled muffin tins with a crumb crust and baked little individual cakes.  the recipe called for using cookie crumbs to coat the bottom of cake after it is baked and turned out of the pan.  this idea sounded a little wacky to me, actually it sounded like a lot of work that just wasn't necessary.  but this is the sort of thing you will encounter every time you bake a cheesecake in a water bath while using a springform pan or one of those specialty cheesecake pans with a removable bottom.  a very long time ago, i abandoned this method because water baths are a pain in the...well, you know what i mean.

on more than one occasion, i have listed my fool proof hints for baking a perfect cheesecake and you can read some of them here or read the entire article here-i apologize in advance for the commercial.  but if you read them, they will help you reach cheesecake nirvana.  one of my rules for cheesecakes is to bypass the graham cracker crumbs.  they are an awful addition to a cake that you have just invested a bit money on-chocolate and cheesecake are not necessarily cheap.  my preference is to use my own cookie crumbs made from my biscotti recipe.  by mixing up a batch of my own cookies, i can flavor them how ever i see fit and i can tailor the crust to the cake.  biscotti crumbs also keep well in the closet.  if you are not inclined to mix up a batch, buy some that have not been dipped in chocolate so that they are not oily after you grind them up.

air is the enemy.  it is so easy to over mix a cheesecake batter and if you incorporate a lot of unneeded air, your cake will souffle and could crack.  it will also sink as it chills and it can kill the texture.  to prevent this, your food processor is your best friend.  it will do a much better job of incorporating the ingredients, especially the chocolate without aerating the custard.  no, i am not mistaken, cheesecake is a custard that is treated like a cake.  think about it for a moment; large quantities of cream cheese mixed with sugar, eggs, more dairy products and chocolate with a tiny bit of flour make it more like a baked custard.  if you approach the recipe with this attitude, and treat it like you would a baked custard, it is suddenly so much easier to understand and succeed.

to fill the cups, i used a portion scoop, a #20 scoop which usually has a yellow handle.  the recipe made 18 muffin sized cakes and a 4" cake that my husband thoroughly enjoyed.

for standard size muffins, they did not take much time in the oven, maybe 20 minutes.  i hate to say this but i didn't really time them, i just watched them like a hawk and when i saw the tops getting a little "dry and blistery"  across the top and a little puffy, i pulled them out of the oven.  they cooled just as quickly and i popped them out of the pans.


because a cheesecake by itself almost seems criminal, i cooked up a batch of cherry topping to go with it.  this is the little 4" cake that my husband and i shared.  well, i tasted it, he ate the rest.  to be honest, i did not get any flavor from the mascarpone-the chocolate completely overpowered it.  if i were to use the recipe again, which is not likely, i would omit the mascarpone and use more sour cream; it would give more flavor and cost a lot less.  the texture of the cake was simply too dense for me, i like my cheesecake to be more on the creamy side.

with a generous helping of cherries and syrup, the cake was pretty good, but if i had my choice, it would not have had any chocolate in it!  however, my husband disagreed, whole heartedly-he enjoyed it with and without the cherry topping.

to see what the other bakers came up with, be sure to visit the tuesdays with dorie page.

Tuesday, February 11, 2014

onion bialys; a tuesdays with dorie post

bialys are one of those things that you either have fond memories of or you have never heard of them.  they aren't very common once you get out of the areas lacking large jewish communities.  having grown up just outside of manhattan in northern new jersey, i knew what they were, i saw them in places that sold bagels but i never ate them.  looking back, i cannot explain why i had never eaten one.  perhaps it was that my mother never ate them or purchased them.  still, that is a little strange since onion bagels and onion rolls made their way into our kitchen on occasion.  

it wasn't until i met my husband that i became more familiar with them.  his fondness for a freshly baked onion bialy made an impression on me; not enough to make me a fellow devotee, but i would at least eat one on occasion.  living in nashville, tennessee has made finding a proper, freshly baked bialy nearly impossible.  on the rare occasion that he encounters one, he quickly proclaims it "okay, but not a real bialy" and knowing how picky he is, i generally avoid bringing them home.  

recently, he had to travel for work and was gone from home for 10 days.  while he loves what he does, he did not particularly like being away for that long.  no matter what hotel/motel you stay in, it just isn't the same and he missed being home.  baking up a bunch of onion bialys for him seemed like it might make the perfect welcome home gift.  it was also a great excuse to turn on the oven on yet another cold and dreary winter day.  luckily for me, this recipe was the latest challenge chosen by my fellow tuesdays with dorie bakers as we work our way through the book, baking with julia.  

first step was to create a sponge.  my husband likes to give me little gifts to use while baking.  he gave me this jar of malt syrup and when i saw that the recipe called for malt syrup or sugar, i went with malt.  in commercial bakeries, malt syrup is used frequently since it offers flavor as well as the needed sugar to feed the yeast.

they wouldn't be onion bialys without freshly sauteed onions.  

now that we have a gas stove in our kitchen, i look for reasons to cook!

the sponge is mixed up and allowed to sit for an hour.  it isn't a very long amount of time but it does contribute to the flavor of the finished product by allowing the onion flavor to steep into the dough.

after an hour, it is very bubbly and ready to be added to the dough.

the dough is mixed up and kneaded with the mixer-at least mine was.  then it sits for a while as it is allowed to double in size.

having made many dinner and sandwich rolls in my time, i could not shape the bialys without first giving them a little twist.  after cutting up the dough, i placed a ball of dough in my hand and gently rotated it in a clockwise motion-you can see that my fingers are closed around the dough and touch the table.  this gentle twist makes a perfect ball of dough that will give the final bialy a nicer, round shape.
keep in mind that you do not need to go crazy, just a few quick swirls around the table; the longer you do it, the tighter the ball gets and the harder it is to make the final flattened round of dough needed for an authentically shaped bialy.

prick the center multiple times to prevent it from puffing up-a fork works well

placed on a cornmeal dusted peel and topped with onions and poppy seeds, these tasty treats are ready to hit the heated stone in the oven.

fresh from the oven

as the afternoon wore on, the light shifted in the kitchen, these bialys would have to wait patiently for my husband to arrive.

they look like funky bagels but honestly, they taste completely different.  

the recipe called for cutting the dough into 12 pieces, i went a little smaller and cut the dough into 16 pieces.  the result was that i was able to share a few as well as eat a few without my husband missing out on any.  to preserve them, i wrapped them individually in plastic wrap, bagged them up and froze them.  he now has a snack when he wants one!

true fans know that slitting and toasting them is optional and not necessarily correct.  old time bialy eaters heat them whole and put a bit of butter in the center with the onions.  however you like them, this recipe worked out well and my husband gave them a firm "pretty good, but..." and i will take that as a check in the success column.  to learn more about bialys, look for a copy of the book, "the bialy eaters:  the story of a bread and a lost world" by mimi sheraton and if you want to try a true bialy but do not want to make them, order some from kossar's, they ship!

to slice or not to slice...that is the question

Sunday, February 9, 2014

cranberry-orange coffee cake; a winter pick-me-up

want to know a secret?  gardeners are optimists.  honest, scouts honor.  think about it for a minute; we put teeny, tiny little seeds into large dirt plots and assume plants will emerge.  as if that wasn't crazy enough, we nurture those plants with the expectations of picking fruits and vegetables to feed ourselves.  in those terms, it almost sounds as if gardeners are a little on the crazy side.  and truth be told, we are.  who else but a dedicated gardener would go outside while the temperatures are just barely above freezing to plant peas and greens?  

by now, you must be wondering what gardening has to do with a winter pick-me-up of cranberry-orange coffee cake.  it actually has nothing to do with actual gardening but it does lead back to the gardeners themselves.  each january, the master gardeners of davidson county, tennessee, begin the annual 14 week training class.  every thursday evening, the new interns attend a lecture related to gardening and a few of the certified members, like myself, are on hand for mentoring, answering questions and offering support.  we also provide refreshments and snacks.  they quickly learn that i am known as "the cake lady from the demo garden."  it could be worse, i suppose.  

with a schedule of lectures lasting 14 weeks, finding a new(or different) recipe for each week is a challenge.  oddly enough, chocolate by itself, does not go over well.  if it is a ribbon or a handful of chips, okay; but just chocolate, not so much.  having a few good base recipes and a well stocked larder make all of the difference.  the recipe for the cake in the photos can easily be manipulated to use different fruits with the same level of success as the cranberries.  it is the perfect "go to" recipe for someone who bakes frequently and tires of making the same thing again and again.  

one big advantage to this recipe is that the majority of it can be completed in the bowl of a food processor.  a few quick pulses to make the crumb topping, a few pulses more to coarsely chop the cranberries and a final round to cream the butter, sugar and eggs for the batter.  the batter is rather forgiving and nearly foolproof so even the least experienced of bakers can mix up the recipe using the food processor and be guaranteed excellent results.

simple manipulations, such as swapping lemon zest for the orange or blueberries for the cranberries will still yield a beautiful cake even if the fruit is frozen.  for the more daring, shred some zucchini and carrots, toss in a generous helping of walnuts and a bit of cinnamon.  this cake is also the perfect solution for using that last, over ripe banana or that lonely apple resting in the bottom of the basket.  whichever route you take, this versatile recipe is sure to produce a well deserved pick-me-up to brighten a dreary winter day.

cranberry-orange coffee cake
makes 1 (10") tube cake serving about 16

crumb topping
1/2 cup unbleached all purpose flour
1/2 cup rolled oats
1/3 cup dark brown sugar
1/2 teaspoon ground cinnamon
1/8 teaspoon baking soda
4 tablespoons unsalted butter, cold and cut into small cubes

cake
1 cup fresh cranberries (can be frozen-do not thaw!)
12 tablespoons (6 ounces) unsalted butter, softened
2 cups granulated sugar
1/2 teaspoon salt
zest of 1 orange
3 eggs
3 cups all purpose flour
1 tablespoon baking powder
3/4 cup buttermilk
1/4 cup cinnamon sugar (3 1/2 tablespoons sugar, 1 1/2 teaspoons cinnamon)

to make the crumb topping, place the flour, oats, brown sugar, cinnamon and baking soda into the bowl of a food processor.  pulse a few times to combine.  sprinkle the butter cubes over the top of the mixture and pulse to cut it together.  continue to process the mixture until it begins to clump.  dump the mixture out of the bowl and set it aside.

preheat the oven to 350.  grease and flour the tube pan and set it aside.  place the cranberries into the processor bowl and pulse to coarsely chop them.  if they are frozen, do not thaw them or they will streak the cake batter so be sure to keep the chopped berries in the freezer until needed.

to make the batter, place the butter, sugar, salt and orange zest into the processor bowl and process until smooth.  with the motor running, add the eggs, one at a time and process until mixed.  scrape the bowl and pulse a few times to be sure it is combined.  dump the batter into a large mixing bowl; the rest of the recipe is combined by hand with a rubber spatula or a large wooden spoon.

place the flour and baking powder into a sifter or a mesh strainer and sift it over the batter.  sprinkle the cranberries over the top of the flour.  fold the mixture a few times to coat the berries with the flour and to begin incorporating them.  sprinkle the buttermilk over the batter and fold it together.  carefully place half of the batter into the prepared pan and spread it out so there are not huge gaps and vacant areas-it does not need to be perfectly level.  sprinkle the cinnamon sugar over the batter in the pan and top it with the remaining batter.  sprinkle the crumb topping evenly over the cake and bake until a pick inserted comes out clean, about 1 hour.  cool the cake in the pan for 20 minutes and then remove it from the pan and allow it to cool completely on a rack.  

the cake is best cut when completely cool.  to store, keep it covered in a cake container at room temperature up to 2 days.  to store in the freezer for up to a month, cut and wrap slices well in plastic and place them in a plastic container or bag before freezing.  thaw the slices, still wrapped in plastic, at room temperature.

Friday, February 7, 2014

sourdough starter; five years and counting


if you have been reading this blog, you know i am a bit of a gardener.  okay, i spend a lot of time in the garden.  more than once, i have spent entire mornings that stretched into the early afternoon working in a garden.  it isn't hard to do if you have the right company and the ladies i work with out at the demonstration garden make it fun to be there-no matter how muddy and buggy it can sometimes be.

mud and bugs; sounds heavenly after all of this cold, miserable weather!  to keep busy until the season changes, i spend my time indoors baking.  one of my favorite things is sourdough bread, especially when it is freshly baked with some of my own organic grape starter.

making starter is a lot easier than you think.  the hardest part is finding organic grapes.  luckily for me, i was able to pick them off the vine in the garden and since i work in that garden, i knew exactly what the grapes had been treated with-absolutely nothing!  if you aren't lucky enough to pick your own, you will have to source them at a grocery store that has a good selection of organic fruit.  you also want them to be as fresh as possible.  a really good starter recipe is the one attributed to nancy silverton.  to make my starter, i followed this recipe to the letter and five years later, it still works!
as a starter is fed and used, it needs to be replaced.  an easy way to do this is to measure your flour and pour it into a small bowl.  add your water and stir to form a thick dough.

this simple dough is all the starter needs!  usually a feeding is all you need to get it ready to make a loaf of bread.  a good, strong starter, like mine, can sit in the fridge for several months and still have the strength to leaven a loaf of bread.  my most recent loaf of sourdough bread was a pane pugliese.  the complete recipe and step by step photos can be found here.

so, until the weather shifts and it warms up, a lot, i will be in the kitchen tending to my starter and dreaming of muddy days in the garden with friends...