Saturday, April 30, 2011

pretty crumby

sorry for the delay-i tend to do this type of work at night and i ran out of steam last night!  the next step in assembling the cake is the crumb coating-and it is a crumby job...right, i can hear the crickets too...for this job, i pulled out my magic bag of tricks-a big yellow toolbox that has just about everything you can think of in it to construct or destruct a cake (all depends on how you look at it)

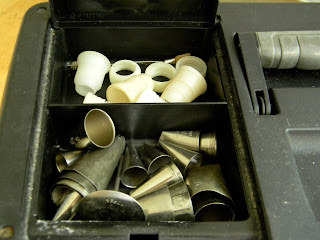
the lid has little compartments for all the tips and couplers that i generally need

the big yellow box

 inside, i have everything else that i need

 the oddest thing in there-a level.  i get puzzled looks when somebody finds it in there.   they ask me what i am planning to build-a cake needs a level space or it may fall over!

 the next step is to make the frosting.  in this case, it was classic meringue butterceam flavored with vanilla.  the sugar is cooked to 238 on a candy thermometer (soft ball stage) and then poured into egg whites to make the meringue


one thing to remember, always have everything ready to go.  once the sugar is at temperature, it cannot wait.  have your mixer ready with the egg whites in the bowl.  next thing to remember-pour that sugar very carefully!  pour it in a thin stream at the side of the bowl as the it whips the egg whites.  if you hit the whip with that sugar it will splatter and sugar at 238 can give you a nasty burn!
 the meringue whips up beautifully and it will cool down to slightly warmer than body temperature.  at that point, you can add the butter(which is very soft but not at all melted) in chunks and allow it to mix up.  it will be very light and fluffy.  add your flavor and mix to combine.  now, it is ready to go.

 at this point in the game, your cake layers must be cold.  never try to do this with room temperature cakes-they crumble.  for this reason, i always make my cakes a day ahead and keep them in the fridge.  if they need trimming or if i am cutting custom sizes, i can be sure that i will get sharp edges and still be able to handle the layers without breaking them.  trim the cakes if necessary and begin assembly.
it's called a crumb coat for a reason, it is a sloppy finish meant to seal in the crumbs and establish the shape of the cake.  it is not supposed to look good at this point.  and don't try to go cheap and only frost it once unless you are coating it with fondant.  take the time to chill the cake with the crumb coating for several hours and then do your finishing layer.  you will have nice sharp lines and a smooth coat to work with in the end.  better yet-no crumbs peaking out at you.

so, since today is the big day, i have a cake to deliver!!! tune in tomorrow for the final coat and the addition of the fresh flowers.

Thursday, April 28, 2011

have your cake and ...

i frequently talk of how time has flown and i am not ready to grow older.  it is also hard to believe how much time has passed-it has been nearly 7 years since we closed our bakery and moved on to other employment.

when we had our bakery, we had several teenagers who worked for us as they went through high school and college.  in the last 7 years, they have all graduated from college and are hard at work on their chosen careers.  but way back when, as they watched me make wedding cakes, i heard them mention how i would be the only one who they would ask to make their wedding cake.  as a mom, i have learned not to listen to idle chatter of teenage girls-you simply cannot keep up with the conversation as it morphs along.

one of the girls came to us as a prep/sandwich cook and moved on to be a baker.  after we closed the shop, she moved on to las vegas and attended culinary school and is now working hard on building a career as a pastry chef.  she also kept her promise-she asked me to make her wedding cake.  it is an honor to be asked-i mean, if it were me, i'd want somebody who can actually bake something tasty to make the cake...just kidding!  it will be plenty tasty.  for this task, i pulled out my binder of recipes from when i wrote my first book, sky high.  in that book is a chapter which includes wedding cakes and i chose the lavender rose cake for this occasion.  there will be a few minor changes-it will not be filled with the jam and the layers are square rather than round.
organized chaos on the counter.  my work space is limited and it is one of the reasons that i do not sell wedding cakes from the house.  there is also the herd to contend with-if there isn't the risk of cat hair in the vicinity of the cake, then i am trying to keep the buggers from eating the cake-yes cats like cake too.

 i did not have all of the pans needed so i decided to use sheet cake pans and cut the layers to size.  since this is a recipe from sky high, that means triple layer cakes and three of each size cake were needed.
 my kitchen aid mixer; it's a trooper and i have had it for more than 20 years.  okay, so first gear is gone but it still gets the job done.  and like any other baker, it can be a little messy.  i wrap it in plastic so the flour doesn't fly too far.

 the first of three batches of batter.  it worked out well and went a bit faster than i expected.  all in all, in three hours i had baked 3(12"x18") cakes and 3(8") square cakes and had even managed to get the place cleaned up.
the cakes cooling on my table.  i was lucky-the cats didn't seem to notice the cakes this time!  tune in tomorrow to see the process of decorating the cake.

Tuesday, April 26, 2011

is it custard or cream? coconut cream pie-#21 of 52 pies

i am not sure what has happened but suddenly, it seems that i am constantly playing catch up.  no matter what is going on, i just feel like i am falling far behind...take this post for instance.  the pie was done on time, the photos too but when i looked at the calendar, it was suddenly tuesday!!!  as i have said before, it's that time of year when we have lots to take care of and we are spending as much time as possible tending to the garden.

for those of you who are familiar with my job, you know that i make coconut custard pies-tons of them each week.  they are pretty tasty too.  often i find myself trying to explain the difference between coconut custard and coconut cream.  so here goes...a custard is usually a dairy product that is thickened with eggs; it can be sweet or savory and it can also have other thickeners like flour or cornstarch in it.  while almost all cream fillings are based on a custard, not all custards are creams.  sounds like i'm mincing words doesn't it?  mainly, it is a lot of opinion but simply put, the main differences between a cream and custard fillings are when and how they are cooked.  in the case of coconut cream and coconut custard pies, the latter is cooked on a stovetop and cooled in a prepared crust while the former is baked in the crust.  since i make the custard version on a nearly daily basis, i decided to go with the cream version this time.

coconut cream pie
1 (9") deep dish pie that serves 8-10

1 (9") chocolate cookie crust-homemade or store bought
1 1/4 cup shredded coconut-do not use the fine cut macaroon coconut
1/3 cup cornstarch
2 cups whole milk
1 (14oz) can coconut milk-do not use the reduced fat variety
2/3 cup sugar
4 eggs
1" piece vanilla bean
whipped cream, recipe follows
preheat the oven to 350.  toast the coconut until it is a nice and even golden brown color.  reserve 1/4 cup for the garnish.  place the cornstarch in a heat proof bowl, add 1/2 cup milk and whisk until smooth. place the remaining milk, coconut milk, sugar and vanilla bean in a heavy bottom sauce pot and heat over medium heat.  whisk the eggs into the cornstarch mixture.  when the milk comes to a gentle boil, remove it from the heat and whisk it into the eggs.  pour this mixture back into the pot and place it over medium low heat.  while whisking constantly, bring it to a gentle boil again for one minute to fully cook the starch and the custard.  off the heat, remove the vanilla bean, stir in the coconut and pour it into the pie crust.  press plastic wrap to the surface and refrigerate until cold, about 2 hours.  make the whipped cream and spread it over the top of the pie and decorate with the remaining coconut.

whipped cream
1 1/2 cups heavy cream
1/2 teaspoon vanilla
3 tablespoons sugar
in a chilled bowl, combine the ingredients and whip until moderately stiff peaks form.  take care not to whip it too stiff or it will be difficult to smooth it out or even worse, you will have butter...


the latest pie round up

this weeks entry comes to us from benni.  you may recall that she has baked one of my pies before and sent photos.  this time, she chose to make the peanut butter and chocolate swirl pie.  the family loved it and if you look at the photos, you can see that she barely had time to take a photo at all...
 going
 going
gone!

thanks for baking with me benni!  for all of you who dare, and i do dare you, double dog dare you to go ahead and bake my day-i mean pie.  send me photos and i promise i will post it here!  bakinbabe116@aol.com

Friday, April 22, 2011

salt rising bread with buckwheat flour-bbd#39

as the host of this month's bread baking day event, i was given the chance to choose the theme.  i have a coworker who talks about the salt rising bread his grandmother made.  they called it stinky bread because of the cheesy scent that it has.  i have always wanted to try it but have been reluctant because many of the recipes tell you how hard it is to get the starter going.  james beard, in his book beard on bread, almost tells the reader not to bother with it due to the fickle nature of the starter.  honestly, i have made three batches of this bread and all three have worked perfectly.

a recent trip to the whole foods across town gave me an opportunity to pick up some different flours.  i chose buckwheat flour and organic blue cornmeal.  rather than use the standard cornmeal for the starter, i went with blue cornmeal and the recipe for salt rising bread #2.   it took approximately 24 hours for the starter to become active.

to make the sponge, i followed the recipe but made a substitution.  i measured 2 tablespoons of flax seed meal, placed it into a measuring cup and then filled the cup with buckwheat flour.  this mixture was added to the sponge in place of one cup of flour.  i then proceeded with the recipe as it is written-use the link above for the recipe.  the photo shows the sponge as it looked after sitting overnight.

the dough after kneading and waiting to be shaped

waiting to be baked

fresh from the oven

warm bread, mmmmmm.....

follow the link and join us, there is still time-deadline is may 1.

Wednesday, April 20, 2011

that's just nuts! chewy nut tart-#20 of 52

bake one original pie each week for 52 weeks.  sounds easy.  actually, it's more work than you might think.  even for me, a person who bakes pies, lots of pies, almost every day of the week.  after the pop tarts, it was tough to come up with an idea.  i wanted something fruity and fitting for spring.  but to be honest, around here, there isn't much fresh fruit to choose from in spring.  it is either shipped in from far away and very expensive or it's frozen and we won't even mention the stuff in the cans...so there i was, wandering the aisles of my local supermarket searching for inspiration at an affordable price.  and then i spied the little packets of nuts-recipe helpers or something like that.  each packet has about a half cup of  nuts in it.  i thought about it for a moment, i had some hazelnuts at home and if i added pecans, walnuts and almonds, i could make a mixed nut tart.

i tossed them together and toasted them in the oven

a cooked syrup of honey, brown sugar and butter makes a gooey tart.  the comb in front of the jar is from our hive-i can't wait to get some of the honey from our bees.  until then, it's honey from the store.

after cooking the syrup, it gets tossed with the nuts and poured into a prebaked tart shell.  then after a bit in the oven, it gets bubbly and later it gets chewy and gooey!

the finished tart, make sure it is completely cooled or it will not cut nicely!


chewy nut tart
1 (9") tart that serves about 8


1 prebaked (9") tart shell-use a rich, short dough rather than a flaky pastry crust
2 cups nuts-any combination of nuts you like, i used equal parts of walnuts, almonds pecans and hazelnuts
4 ounces unsalted butter
1/3 cup brown sugar-light or dark
1/3 cup honey-any light variety
2 tablespoons heavy cream (or coconut milk if you have some open)
1 teaspoon vanilla 

preheat the oven to 350.  completely bake the tart shell making sure that it is just beginning to turn a light golden brown.  if the dough is sweetened, take care not to allow it to color too much or it will gain a burned flavor during the second bake.  do not remove the crust from the pan at this point or it could collapse.  mix the nuts and place them on an oven proof pan.  toast the nuts until fragrant, about 5-7 minutes.  allow them to cool while you make the syrup.  in a sauce pot over medium-low heat, melt the butter with the brown sugar and the honey.  stir it occasionally to prevent hot spots and scorching.  bring the mixture to a gentle boil and allow it to boil for 5 minutes.  stir in the cream and the vanilla and bring it back to the boil for a minute.  remove from the heat and combine with the nuts.  scrape the filling into the tart shell and bake it until it is bubbly, about 10-15 minutes.  cool completely, remove the tart from the pan and cut into wedges with a sharp knife.

and as always, bake one and send me a photo-i will post it here!  bakinbabe116@aol.com  come on, i dare ya!  double dare ya!!!

Monday, April 18, 2011

pie #19-homemade blueberry toastries

a day late and a dollar short-the summary of my life lately.  no matter how hard i try, i am perpetually scrambling to meet a deadline and not always successfully.  it is spring and that means i have work to do in the garden; at home we have a vegetable garden, an herb garden and many other separate beds of flowers, plants, shrubs and trees.  then there is the demo garden where i do my volunteer hours for the master gardeners-too much to type, just look at it here.  did i mention the bees?  we have one colony and they need our attention on occasion.  then there is the house, the girls-they both graduate this year, the herd (too many cats and a dog) and did i mention my full time job?  at a busy restaurant? which makes coming home and baking seem like too much some days?  oh and there was that big birthday for my husband last week-he's 39 again...

is it any wonder that i decided to make pop tarts for last week's pie?  comfort food, a return to carefree childhood days and nothing more important than the lunch menu in the middle school cafeteria or maybe this week's spelling test on my mind.  i tell both of my girls regularly that they will long for the days of high school-no worries more importantly, no bills, just school.  they don't believe me now, but we all know that someday, they will and i doubt they will ever tell me so.

i experimented with two different doughs and settled on the second one.  it is more like a tart dough and has sugar, egg and buttermilk in it.  in the end, it was easy to work with-even the scraps.  it held the jam without bursting and after almost a week, the toastrie dough was still tasty with a nice texture.  they never had the cardboard snap of the commercially produced tarts and remained a little on the softer side but even so, everyone who ate one, reached for a second.


one thing to keep in mind, you can use any flavor filling you like.  i happen to like blueberry and made a quick batch of jam with just a one pound bag of frozen blueberries from the grocery store.  you could use raspberry, blackberry, rhubarb or pineapple-all of those are available frozen which makes them a little more affordable than fresh fruit.  if you have a surplus of apples or pears-try those.  and while i did not experiment with things like nutella or lemon curd, i am pretty sure that either one would be pretty tasty.


i didn't need any special equipment either.  armed with a set of square cutters that range in size from 1 3/8" to 2 5/8", i chose the largest cutter but you could do this just as easily with a ruler and a pizza cutter.   to make the fluted edges and to prick the tarts (to allow the steam to escape during baking) i reached into the silverware drawer and used a regular fork.


lined up on a tray, they baked up quickly.  this was a quick treat to make and one of those things i hope to add to my list of things to make at home myself from now on.  just as soon as we move to a 36 hour day and my new clone arrives.  i really need to simplify my life-eliminate and reorganize the excess-now, to find the time to do that...


homemade blueberry toastries

yields 16 small treats-each one is about 2 1/2" square

toastrie dough
1 1/2 cups all purpose flour
1/3 cup sugar
1 teaspoon baking powder
3/4 teaspoon salt
8 tablespoons unsalted butter, cold and cut into cubes
1 egg
2-3 tablespoons buttermilk
egg wash (1 egg and 1 tablespoon water)
jam filling-recipe follows

in a mixing bowl, stir together the dry ingredients to combine them.  cut in the butter until it is in small pieces and is beginning to resemble a coarse meal.  add the egg and 2 tablespoons of the buttermilk and mix gently to combine and only until it comes together.   add the additional tablespoon of buttermilk only if the dough seems a bit dry or crumbly.  you want a soft and pliable dough but not a wet and sticky one.  wrap the dough in plastic and chill it for 30 minutes to make it easier to work with.

preheat the oven to 350.  on a large, floured surface, roll the dough 1/8" thick.  i did this in two batches to keep the dough from getting too soft as i worked.  cut the squares and place half of them on a lined baking pan-paper or silpat will make it easier to work with if any of the jam leaks out.  brush the edges with a light coating of egg wash and place a dollop (about 2 teaspoons) of jam in the center of the square.  add the top square and gently press the edges with your fingertips to seal.  using a regular fork, press the edges to make a decorative seal and prick the center of the toastrie several times to make steam vents.  do not egg wash the tops or you will seal the vents and the toastries may burst.  

homemade blueberry jam filling
makes about 1 2/3 cup

1 pound blueberries-i used frozen
1 cup sugar
zest of one lemon
piece of vanilla bean pod (i always save the scraped out pods to use for things like this)
1-2 tablespoons all purpose flour

thaw the berries and place them and the juices into a blender.  with the lid securely fastened (does this sound like experience talking???) blend them lightly just to chop them coarsely-do not puree them!  place the berries into a pot with the remaining ingredients and bring them to a slow boil.  allow this mixture to boil gently for about 15 minutes.  remove the vanilla pod and pour into a heat proof bowl.  chill completely before using-several hours or overnight.

when you are ready to make the toastries, measure out 1 cup of jam and reserve the rest for another use (homemade scones, anyone?).  if the jam seems thin and a little runny, stir in the 2 tablespoons of flour.  otherwise, if you were able to release lots of pectin and your jam is thick and gelled while it is cold from the fridge, just stir in 1 tablespoon.  mine was a little on the thin side so i used the full amount.

and look for me to have this weeks pie up soon-i am working on that today along with another loaf of salt rising bread.  and as always, bake it and send me a photo-i will post it here!  bakinbabe116@aol.com.  happy baking!!!

Wednesday, April 6, 2011

hostess with the mostest-bread baking day #39, salt rising bread

Bread Baking Day #39 - Salt Rising Bread (last day of submission May 1st, 2011)it's that time again.  what time is that you ask-why it is bread baking time and luckily for you, i am hosting this month's bread baking day celebration.  for those of you not familiar with bread baking day, it is a monthly event for bread bakers of all skill levels which was created by none other than zorra of kochtopf.  each month, the chosen host picks a theme and the participants bake a bread to match the theme and then blog about it.  at the end of the month the host posts a round up featuring photos of what each participant has baked.  since the theme changes each month, there is always something new to look at and learn about.  still not sure, then hurry over to cindystar's blog to check out the round up for march.  
baking bread is something i truly enjoy.  there is something magical about turning a wet, sticky mess into a smooth and elastic dough and finally watching as it rises in the oven.  better still is the chance to do this without adding a bunch of yeast by growing your own natural leavener.  but honestly, sourdough has been done-over done to some extent and that is why i have chosen to go to the next level.  the theme for april 2011 is salt-rising dough.  a mixture that can include potatoes, stone ground cornmeal and milk is allowed to ferment and the resulting bacterial growth leavens the bread.  so before you think this is sourdough, it is different in that it uses yeast as well as bacteria for the leavener and it does not ferment long enough to actually be sour tasting.  it is also notoriously fickle and difficult to make.  everything i read about it stated that i may or may not get bread.  that sounded like a challange, almost a dare so i had to jump in and give it a shot.

for those of you that have not heard of this bread, i am posting two recipes at the end of this post that you can use.  however, feel free to use any salt rising bread recipe that you like and to include it in the post with as many helpful hints as possible.  anyone brave enough to bake along needs to know a few rules for participating:
  1. please keep in mind that i speak and read in english-when you contact me, do so in english please. also, please have your blog post in english or at least partially in english and if you can add a translator button to the nonenglish parts of your blog-wonderful.  
  2. post your entry on your blog and link back to this page.
  3. email me with the following information:  name of your blog, the permalink for the post, your name, country and city and a 300x300pixel photo of your bread.
  4. the deadline is may 1, 2011.
  5. email me at bakinbabe116@aol.com and be sure to put bbd#39 in the subject line.
good luck bakers, may the power of bread be with you!


salt-rising bread #1
one note about this process-it has an incredibly strong odor!  when i say that, i mean it really smells bad from the moment that the starter begins to ferment to the moment that it finishes baking.  you may think something has gone wrong but do not worry, it has a pleasant flavor with no hint of the stink!  it truly lives up to the reputation of having a cheesey smell and taste. 
adapted from the fannie farmer baking book by marion cunningham
3 (8x4x2) loaves

starter
2 medium potatoes-peeled and sliced thin (i forgot to peel mine!)
1 quart boiling water
1/4 cup stone ground cornmeal-needs to be whole grain cornmeal
2 tablespoons sugar
1 teaspoon salt
place the potatoes in a bowl and add the water.  stir in the remaining ingredients and place this somewhere that the temperature will remain warm constantly-i used my oven with the light on.  allow this to sit for 24 hours which will give it time to get foamy on top and develop the bacteria and the cheesy smell.  remove the potatoes and discard them.

the potato starter fully fermented-warning:it smells strongly!
sponge
1 1/2 cups milk
the starter
1/4 teaspoon baking soda
3 1/2 cups all purpose flour
heat the milk until it is a little warmer than body temperature.  add the milk, baking soda and the flour to the starter and mix until smooth.  cover and set it in the same warm spot until it doubles in bulk-about 2-3 hours it will be creamy and light when ready but do not let it go too long because it will begin to sour and that will change the flavor.

the sponge made from the potato starter
dough
4-6 cups all purpose flour
2 1/2 teaspoons salt
6 tablespoons shortening
the sponge
place 4 cups of the flour and the salt in a mixing bowl and rub in the shortening thoroughly.  add the flour mixture to the sponge and mix it until combined.  using the remaining flour, knead it into the dough as required to form a smooth and slightly heavy dough-about 10 minutes.  divide into 3 pieces, shape them into loaves and place into greased loaf pans.  allow to rise until about 1/3 larger and expect this to take as long as 3 hours-i did it overnight in the fridge and then let it sit on the counter until room temp.  bake at 350 until golden brown, 45-55 minutes.  turn out of the pans and cool on a rack

the bread baked from the potato starter has a dense crumb and while it loses the smell during the baking, it retains a cheesy aroma


salt rising bread #2
adapted from the american woman's cookbook-wartime edition, 1944
this is an old book but not a completely uncommon one-i have two different editions and have seen others in stores that sell old books.
2 loaves

starter
1 cup milk
2 tablespoons stone ground cornmeal-whole grain cornmeal
1 teaspoon salt
1 tablespoon sugar
heat the milk but it is not necessary to get it hot, stir in the remaining ingredients.  pcover the bowl and place it somewhere warm-again i used m oven for this step.  let it rise until it starts to get bubbly-the recipe states this will happen in 6-7 hours, i let mine go almost 24 hours to get it bubbly.

the milk starter at the beginning on top and fully developed on the bottom
sponge
1 cup warm water
1 teaspoon salt
1 tablespoon sugar
2 tablespoons shortening, oil or butter-melted and cooled if solid
2 cups all purpose flour
add the ingredients to the starter and mix until smooth.  allow the sponge to rest, covered, in the warm spot until it gets bubbly-mine took about 4-6 hours.

dough
about 3 cups all purpose flour
stir in about 2 1/2 cups flour to make a soft dough.  using some more of the flour, turn the dough out onto a floured  surface and knead it until smooth and no longer sticky-about 5-10 minutes.  shape into loaves and place into greased loaf pans.  place the pans in the warm spot and let them rise until doubled
the bread baked from the milk starter has a slightly more open crumb and luckily, it never  gained the smell that the potato starter had. 

Monday, April 4, 2011

berry rhubarb pie-#18 of 52 pies

 for me, spring is one of the most wonderful times in the year.  the visions of flowers and mushrooms dancing around in my head... planting the garden, pulling weeds, preparing the bee hive for the honey flow, cleaning out the freezer... where did that come from?  well it does need to be done and this weekend, i cleaned mine out-kinda, sorta.  in the process, i found some rhubarb and some raspberries that needed to be used up and when darry asked me to make a pie for our mushroom hiking friends, i decided to use them in the pie.  along with some strawberries and lots of other good things like orange zest, vanilla bean, pumpkin pie spice, cardamom and rosewater, i made a lattice topped pie for our hiking/lunch date with friends.


first, place your bottom crust in the pan and trim it to leave an even 1" of dough all the way around.  pour in the filling.  lattice tops are an easy way to make a pie look fancy.  to keep your sanity, work with part of the dough at a time and don't worry about weaving the strips.  simply laying them out in two layers will be easier and elegant all at the same time.
once you have your second layer of strips on top, carefully roll the edges up to make a raised rim of dough all the way around the edge of the pie plate.
using your fingertips, flute the edges.  finally, brush the strips (not the fluted border or it will darken too much in the oven) with a little egg wash and sprinkle it with some sanding sugar.  into the oven she goes...
berry rhubarb pie
1 (9") pie serving 8

crust
2 2/3 cup all purpose flour
1 teaspoon salt
1 cup shortening-i used a non-hydrogenated shortening found in the health food section of my grocery store.
1/3 cup cold water
1 1/2 tablespoon vinegar-white or cider
berry-rhubarb filling, recipe follows

in a bowl, stir the flour and salt.  cut the shortening into the dry ingredients until it is in small pieces.  add the cold water and vinegar and mix until a smooth dough is achieved.  divide into two pieces but not equal pieces-one should be slightly larger than half the dough.  wrap them and chill them for about an hour.  allow them to soften slightly before rolling them out.  preheat the oven to 350.  roll the smaller piece into a circle and fit it into the pie plate making sure that at least 1" of dough overhangs the edge of the plate.  trim away any parts that are more than 1".  to make it easier to handle, place  the pie plate on a sturdy baking pan that is lined with paper or foil and grease it slightly to prevent the plate from sticking.  make the filling and pour it into the crust.  to make the lattice top, divide the remaining dough into 2 or 3 pieces.  to prevent the dough from toughening, make an effort to roll it into a neat rectangle wide enough to fit the width of the pie.  cut the strips about 3/4" wide to fit the pie and be sure to use the photos above as a reference.  finally, flute the edges and bake the pie for about 1 hour and 15 minutes or until the juices are bubbling in the center.  allow the pie to rest for at least 4 hours or it will be too runny to serve.  

berry rhubarb filling
2 cups of halved strawberries
1 cup raspberries
1 cup rhubarb-slice about 1/4 inch thick
1 cup sugar
4 tablespoons cornstarch
1-2 teaspoons freshly grated orange zest
1/2 teaspoon pumpkin pie spice-or cinnamon
1/4 teaspoon cardamom
1/4 of a vanilla bean-seeds scraped out and the pod reserved for another use
2 teaspoons rosewater
toss the berries and rhubarb together-if using frozen, allow them to thaw completely but measure them while frozen.  combine the sugar, cornstarch, orange zest, spices and vanilla and rub them together to disperse them evenly.  toss the fruit and sugar together and add the rosewater-mix to combine and pour into the prepared pie shell.

and as always, if you bake one and send me a photo-i will post it here.  contact me at bakinbabe116@aol.com.  and now if you will excuse me, i think i hear some morels giggling in the woods and i must go find them